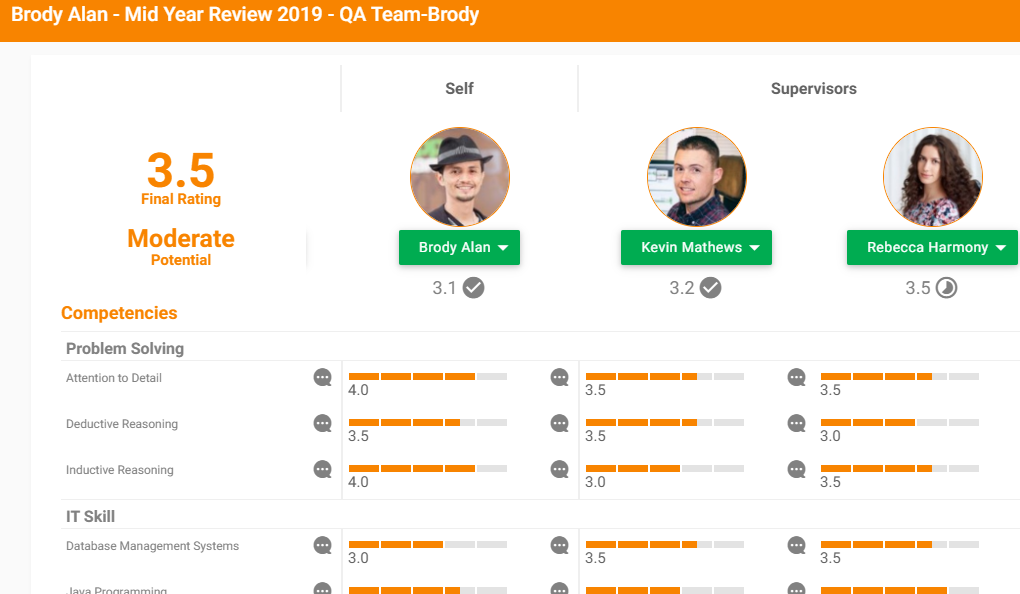
This document helps the user to understand how to use the performance module system functionalities, capabilities, step-by-step procedures to access the module.
Once the employee completes their appraisal, an email notification is sent to the supervisor and the
the supervisor can log into the OrangeHRM system to complete their review as a Supervisor.
Review Employee Appraisal
The user needs to log in to the system and select "Appraisals" under "Performance" and click the "My Appraisal". The system will navigate the user to the appraisals which are assigned for the user.

There are two views of an appraisal, one is the "Single View" and the other one is the "Multiple View".
Single View ( Expanded View of Appraisal)

Multiple View (To view all the reviewer’s review)
Select the below-highlighted icon on top of the appraisal form to switch to the Multiple view option.

When selecting the "Multiple view option" the system navigates displayed all the evaluators in one screen.
Once user clicks on the Review icon the system will direct you to the single view of the appraisal. The ratings can be added from 1 to 5 and comments against every Objectives and value in the appraisal form by giving the ratings based on the subordinate's work performed during the period.
The ratings can be kept as in drafts by clicking the "Save" option and resume that for later review.
Click “Submit” once you have fully completed your review. If you confirm to submit this appraisal, click “OK” to complete this self-review. You can see the self-review with an “In-progress” status and now the main evaluator needs to complete the next level.
Once you submit the Employee-review, the appraisal looks as shown below.

Once the you have submitted the reviewed employee get notified via email.
Create Goals
The supervisors can create goals for their subordinates and all those created goals are listed under the "Goals List" section. It is possible to view the goals through Performance -> Goals -> Goals List.
Add Goal
Select add goal option from by hovering over the plus icon on the screen.
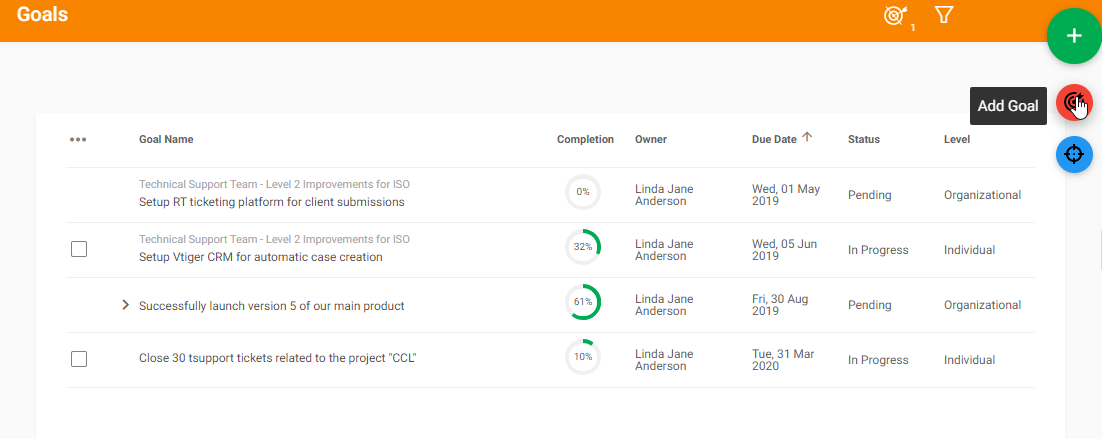
The system navigates the user to the "Add goal" screen and the requested information should be filled as follows.

First, add the goal name and the goal description and set the goal "Due date" and the evaluator groups. If the created goal is a child goal of another goal, user can add the parent goal name in the "Parent Goal" field. In the Level section, you can select the suitable type as the business Goal or the individual Goal. Next, assign the goal to the respective employee by selecting the employee name from the "Assigned To" field and click save.
Add OKR
Select add 'Objective with Key Results' option by hovering over the plus icon on the screen.
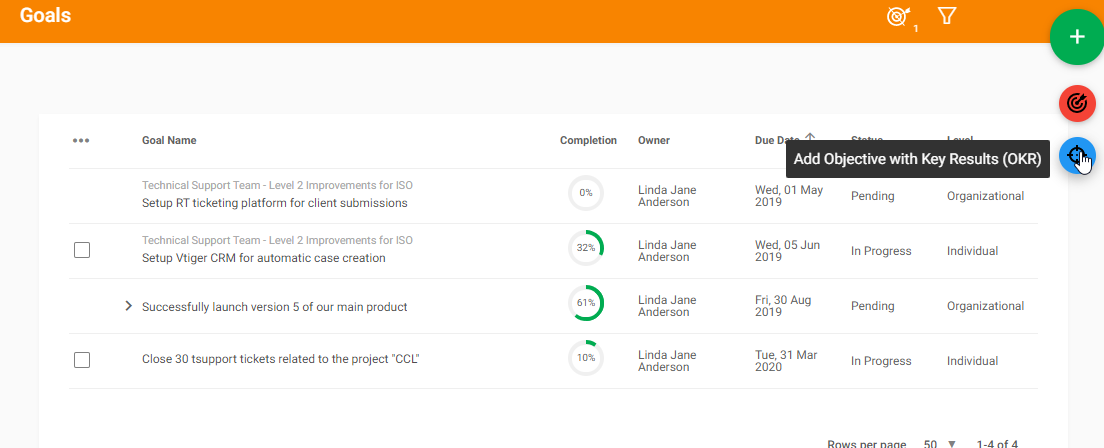
The system navigated to the screen where the user needs to fill the objective goal information and assign the OKR to the employee.

First, add the OKR name and the description and set the OKR "Due date" and the evaluator groups. If the created goal is a child goal of another goal, user can add the parent goal name in the "Parent Goal" field. Next, assign the OKR to the respective employee by selecting the employee name from the "Assigned To" field and click save.
In this section, by selecting the "Bulk Assign", the user can assign the OKR for multiple employees. User can select multiple employees by their job titles, Location and sub-units for assign OKR's in bulk.
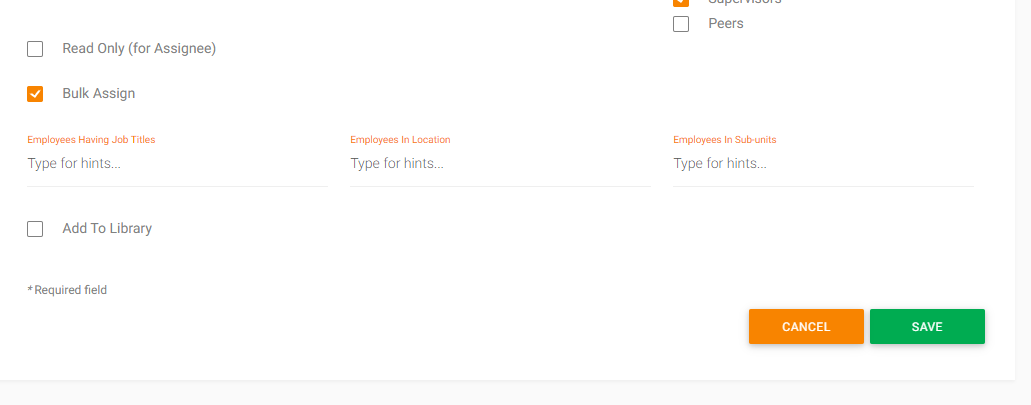
When saving the OKR goal information, the user can add the key results for the created objective. By clicking the "Add" the user can add the Key Results as shown below.
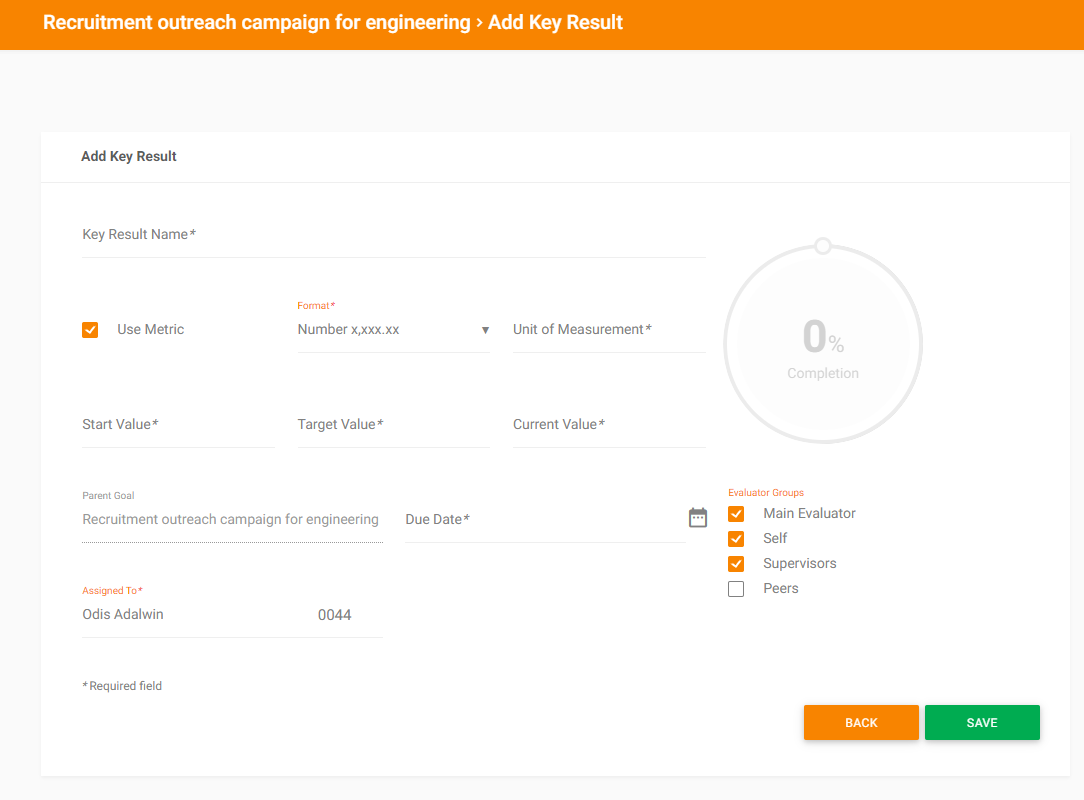
Fill the above information and save the Key result. Similarly, the user can create multiple key results and save. Refer to the article.
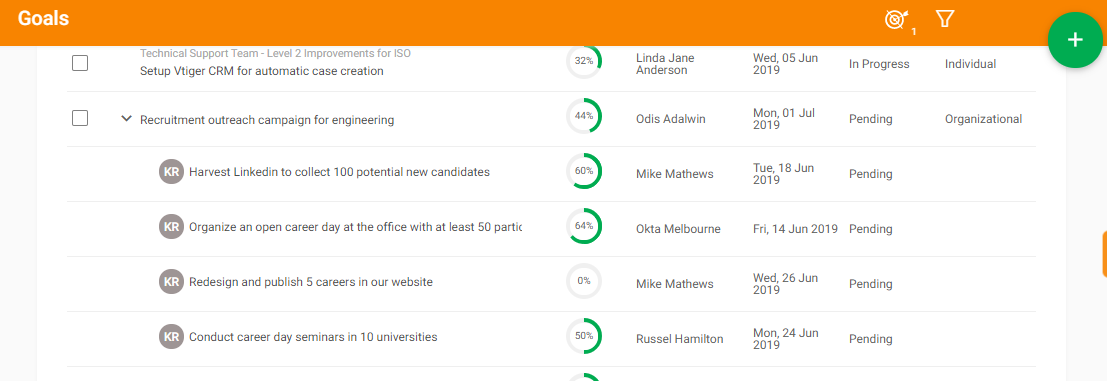
Upon saving the key results, all the created key results are shown under the objective. Once the employee updates the completion for each key result, the completion rate for each key result can be shown as below.
 From the Goal list screen the user can view the Objectives and the key results that are created for the objectives by expanding the objective.
~ END ~
